Table of contents
Open Table of contents
Overview
One of the primary challenges I encountered while developing a full-stack application was implementing robust authentication. Each project required a unique approach to ensure optimal integration. Initially, I experimented with various authentication providers, such as Clerk, Kinde, and Firebase/Supabase Auth, which handled user authorization externally and managed user data on their platforms. However, this setup often proved inconvenient and complex to maintain.
To streamline this process, I developed a reusable Next.js component that seamlessly integrates into my codebase, providing a consistent and efficient solution to the authentication challenge. This component has significantly simplified the authentication process across my Next.js projects.
Features
- User ROLE control
- Email Verification
- Password Reset
- TwoFactor Authentication
- Public Routes and Protected Routes
- User Profile Update
Setup
- Clone the repository from the Github Link
- Setup the environment variables as below, get the api keys from resend which is used for emailing.
DATABASE_URL="DB url"
AUTH_SECRET=auth-secret

GITHUB_CLIENT_ID=
GITHUB_CLIENT_SECRET=


GOOGLE_CLIENT_ID=
GOOGLE_CLIENT_SECRET=

RESEND_API_KEY=

NEXT_PUBLIC_APP_URL="http://localhost:3000"
- Run
npm installandnpm run devto start the app locally
Oauth providers
The Oauth providers can be used as per requirement, it can be altered in file auth.config.ts present in root directory
    providers: [
        GitHub({
            clientId: process.env.GITHUB_CLIENT_ID,
            clientSecret: process.env.GITHUB_CLIENT_SECRET,
        }),
        Google({
            clientId: process.env.GOOGLE_CLIENT_ID,
            clientSecret: process.env.GOOGLE_CLIENT_SECRET,

        }),
        // others (Don't forget to import them from next-auth)
    ]
Here is list of Oauth providers supported by auth.js

Middleware
Middleware are bit tricky to maintain when developing APIs and making certain data public. The middleware.ts file in root directory holds the definition of which route is public and which not.
export default auth((req) => {

    const { nextUrl } = req;
    const isLoggedIn = !!req.auth;

    const isApiAuthRoute = nextUrl.pathname.startsWith(apiAuthPrefix);
    const isPublicRoute = publicRoutes.includes(nextUrl.pathname);
    const isAuthRoute = authRoutes.includes(nextUrl.pathname);

    if(isApiAuthRoute) {
        return;
    }

    if(isAuthRoute) {
        if(isLoggedIn) {
            return Response.redirect(new URL(DEFAULT_LOGIN_REDIRECT, nextUrl))
        }
        return;
    }

    if(!isLoggedIn && !isPublicRoute) {
        let callbackUrl = nextUrl.pathname;
        if(nextUrl.search) {
            callbackUrl += nextUrl.search;
        }

        const encodedCallbackUrl = encodeURIComponent(callbackUrl);

        return Response.redirect(new URL(`/login?callbackUrl=${encodedCallbackUrl}`, nextUrl))
    }
    return;
})
export const config = {
    // Middleware will invoke the given route path
    matcher: ["/((?!.+\\.[\\w]+$|_next).*)", "/", "/(api|trpc)(.*)"],
  }
Routes are divided as public, auth and api route. I have not used APIs to build the component, so all of them are private. If you need to develop APIs and need to make them public, don’t forget to modify this file. One such example is
const isApiGetRoute = nextUrl.pathname.startsWith('/api') && req.method === 'GET'
This will make the /api route with GET request publicly accessible. The routes.ts also needs to be modified
export const publicRoutes = [
    "/new-verification",
    "/api/:path*",
    // other public routes
]
Check my admin-panel code that I built for my e-commerce platform for more reference.
Defining Routes
routes.ts file in root directory holds the information of public routes, auth routes, api and default login route
/**
* An array of routes that are accessible to the public
* These routes do not require authentication
* @type {string[]}
*/
export const publicRoutes = [
    "/",
    "/new-verification"
]
/**
* The default redirect path after a successful login
* @type {string}
*/
export const DEFAULT_LOGIN_REDIRECT = "/settings";
The public routes should be added in publicRoutes const that doesn’t require signing up and the DEFAULT_LOGIN_REDIRECT will be the route opened after successful login to the app.
User/Account Schema
model User {
  id            String          @id @default(cuid())
  name          String?
  email         String          @unique
  emailVerified DateTime?
  image         String?
  password      String?
  role          UserRole        @default(USER)
  accounts      Account[]
  isTwoFactorEnabled   Boolean @default(false)
  twoFactorConfirmation   TwoFactorConfirmation?
}
Role, Image and TwoFactor are optional, can be removed it not required. Account is associated with user, so if user is deleted, account will be deleted as well
model Account {
  id                String          @id @default(cuid())
  userId            String
  type              String
  provider          String
  providerAccountId String
  ....
  session_state     String?

  user User @relation(fields: [userId], references: [id], onDelete: Cascade)

  @@unique([provider, providerAccountId])
}
type stores the type of provider that the user have used to sign-in in the application. Further Schema can be modified as per requirement
Client and Server Components
I have created separate hooks showing how user data can be fetched in both client side and server side. auth from @/auth can be used to fetch user details in server side.
import { auth } from "@/auth";

export async function currentUserServerSide() {
    const session = await auth();

    return session?.user;
}
Auth.js provides a session for the current user, making it much easier to access user details without repeatedly fetching data on the client side. This reduces the need for back-and-forth requests between the client and server, streamlining data access and improving overall application performance.
Similarly, user data can be fetched on client side by using useSession from next-auth/react
import { useSession } from "next-auth/react";

export const useCurrentUser = () => {
    const session = useSession();

    return session.data?.user;
}
Admin Route
/admin is a protected route and showcase how to check for admin role and grant certain permission.
admin.ts is a server action that checks for the admin role and return accordingly
"use server";

import { currentRoleServerSide } from "@/hooks/currentUserServerSide";
import { UserRole } from "@prisma/client";

export const admin = async () => {
    const role = await currentRoleServerSide();

    if(role === UserRole.ADMIN) {
        return { success: "Allowed Route!"}
    }

    return { error: "Forbidden Route!"}
}
Setting Page
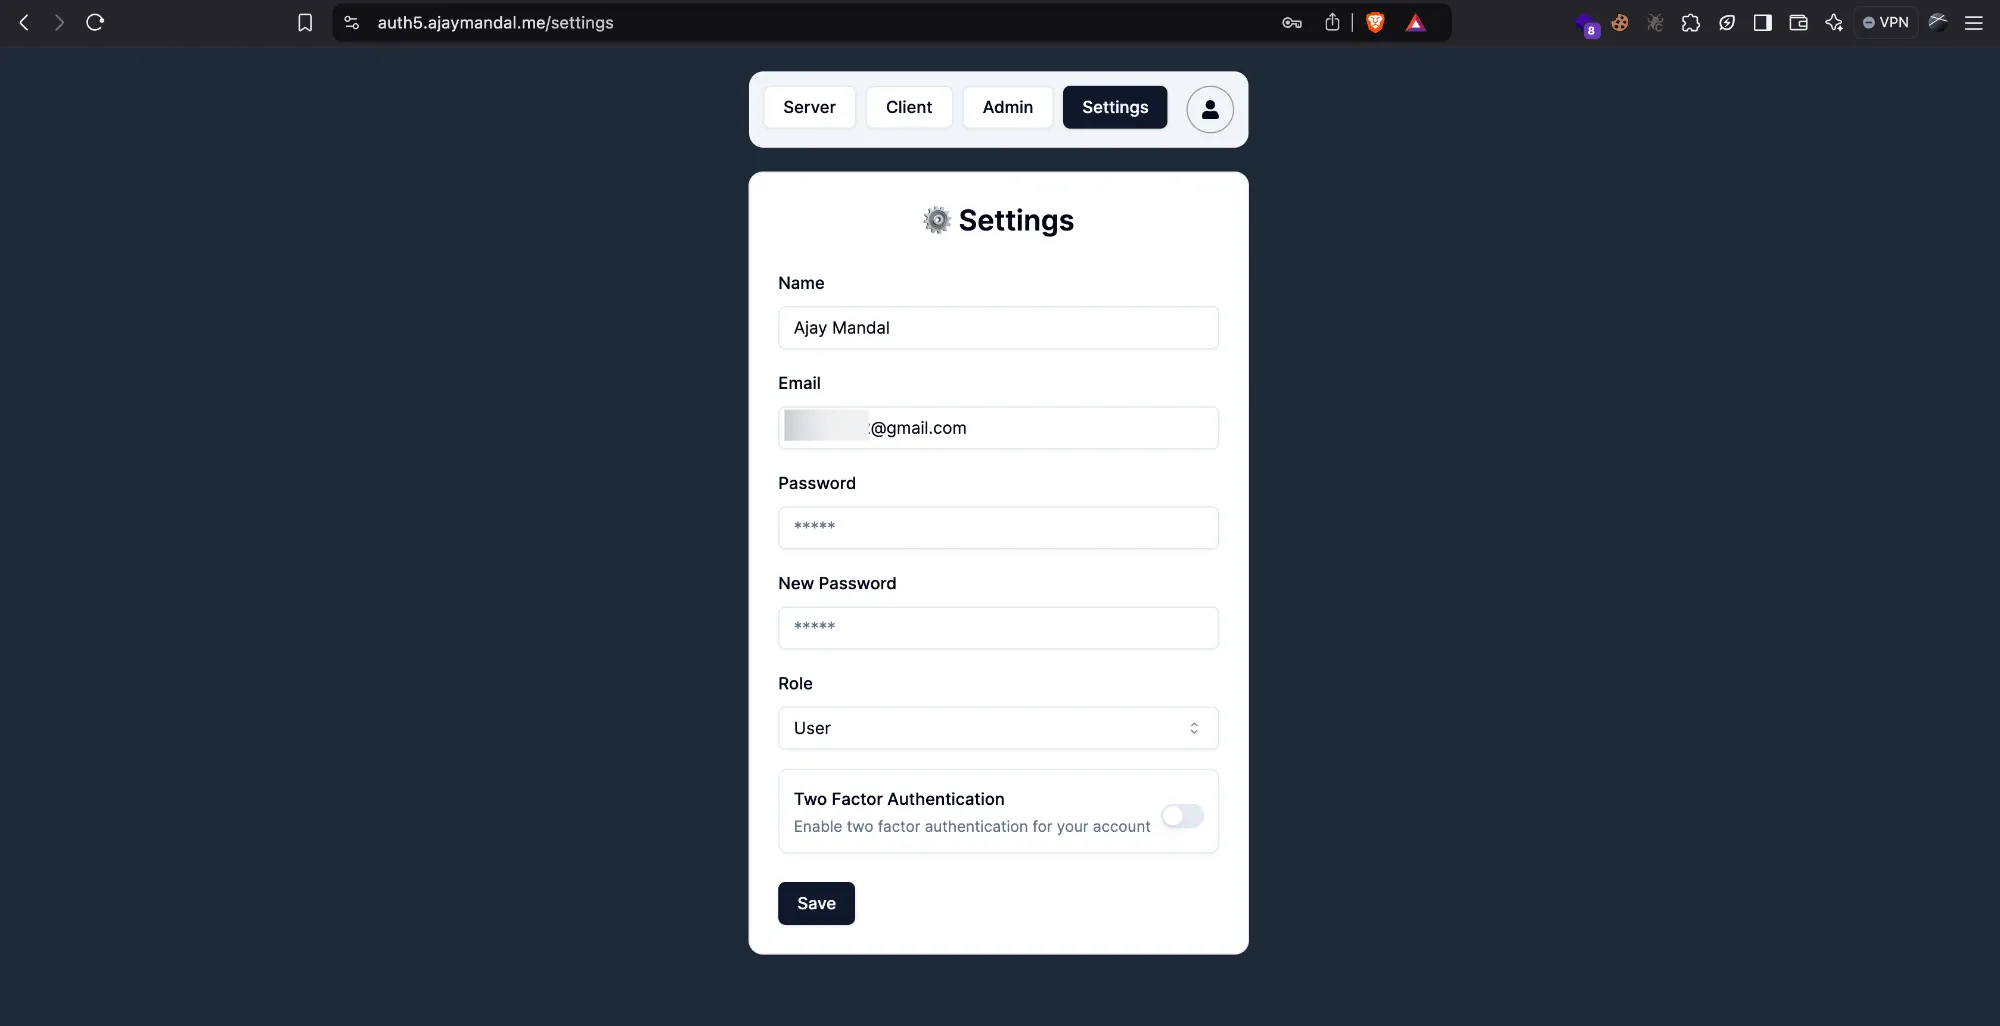
Setting Page allows the Credentials users to do everything with their account. Uploading profile image is left, but that just a piece of cake to implement. User can turn on twoFactor, change role, name, password and email as well.

Mail Template
mail.ts holds the template of mails that are sent to user for verification/password-reset. It can be customized my editing the html tag
export const sendTwoFactorTokenEmail = async (
    email: string,
    token: string
) => {

    await resend.emails.send({
        from:"mail@auth5.ajaymandal.me",
        to:email,
        subject: "Two-Factor Confirmation",
        html: `<p>Your 2FA Code: ${token}</p>` // Template to be edited
    });
}
With that said, please feel free to review the component and integrate it into your Next.js app. For any questions or further assistance, feel free to reach out to me via email.
Thank you for reading this far.